EduCase Uploader Tool
EduCase Uploader Tool
The EduCase Uploader Tool is our proprietary tool that clients can use to upload a case to an EduCase server. The Uploader Tool is only available to clients with EduCase websites.
The EduCase Uploader Tool can load the following DICOM file types:
- CT.xxxxx.dcm: CT images are parsed and uploaded as JPEG files
- PT.xxxxx.dcm: PET images are parsed and uploaded as JPEG files
- MR.xxxxx.dcm: MRI images are parsed and uploaded as JPEG files
- US.xxxxx.dcm: Ultrasound images are parsed and uploaded as JPEG files
- RD.xxxxx.dcm: RT Dose files are parsed and uploaded as XML data
- RS.xxxxx.dcm: Structure files are parsed and uploaded as XML data
- RE.xxxxx.dcm: Spatial Registration objects are parsed and transform secondary data sets to the primary data set for co-registration
Login
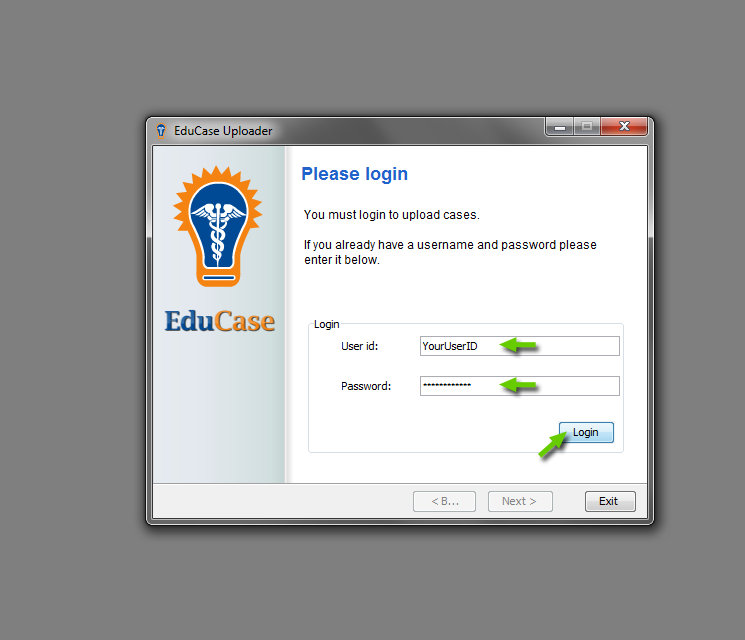
- Enter you User ID and Password
- Click "Login" to continue
Terms of Service and Agreement
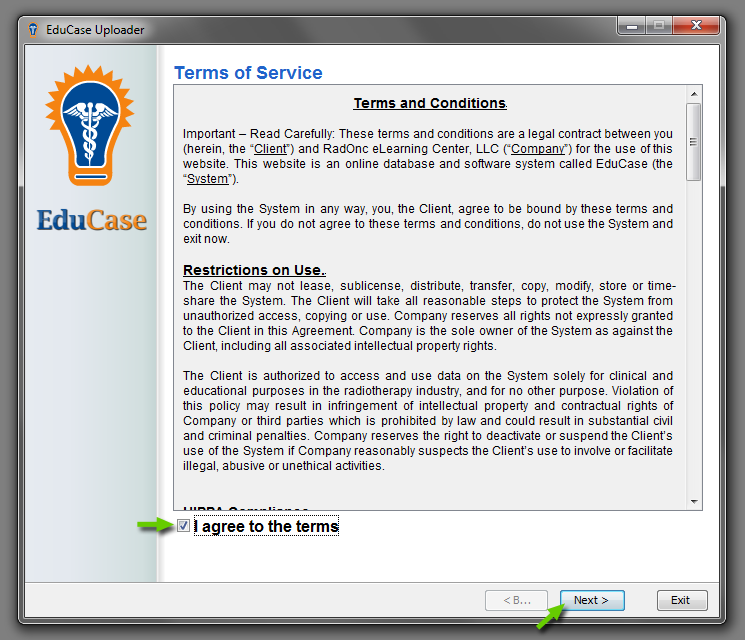
- Read the "Terms of Service"
- Click the "I agree to the terms" checkbox if you agree
- Click the "Next" button to continue
Uploading Case Data
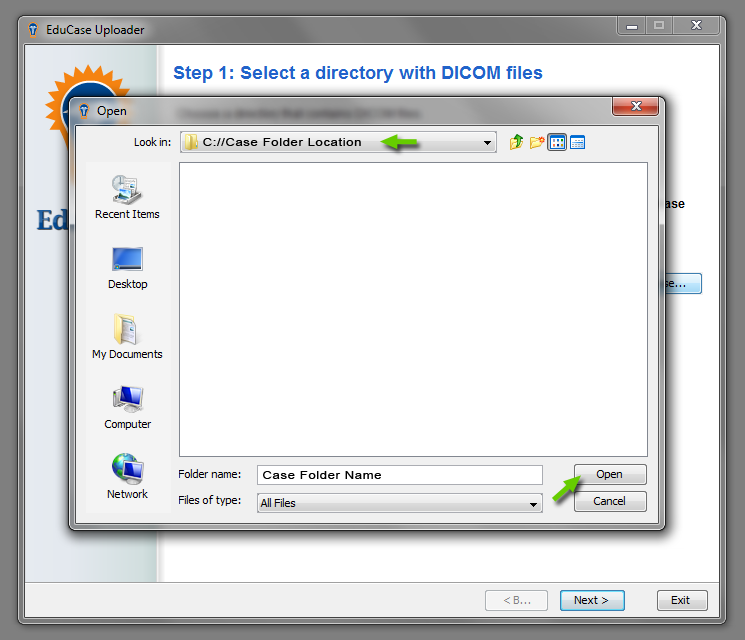
- Click the "Browse" button to browse for case data to upload
- Select the root folder where your case data resides
- Click "Open" to continue
Including Sub-Folders
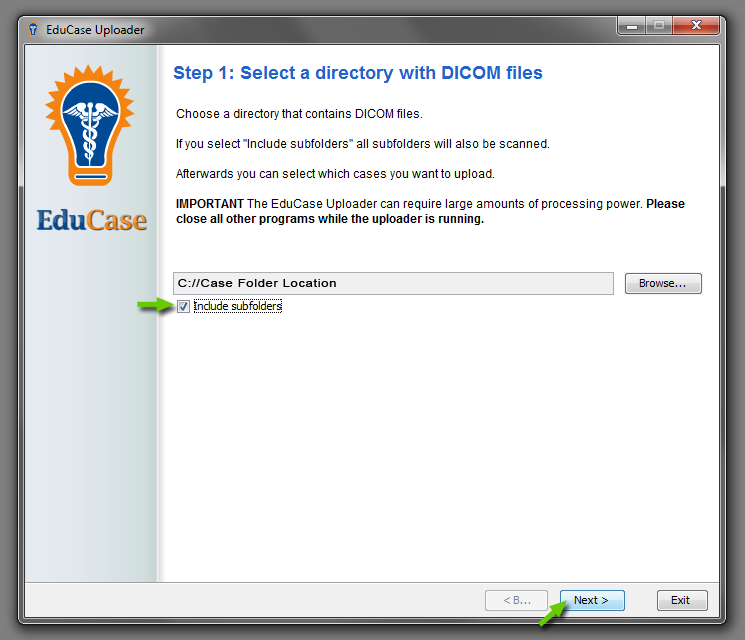
- Select the "Include subfolders" unless all of your data resides in the root folder
- Click "Next" to continue
Parsing DICOM Data
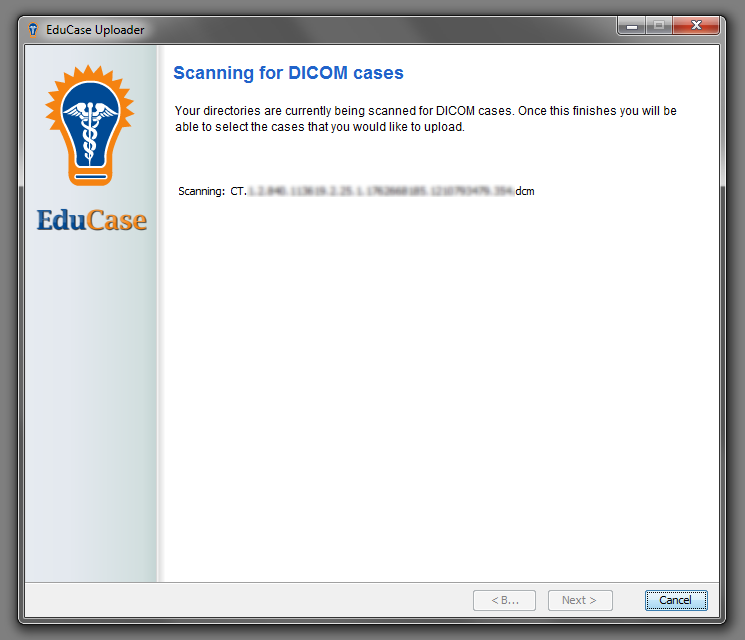
- The Uploader Tool will scan your files to determine what to upload
What DICOM Tags are Uploaded
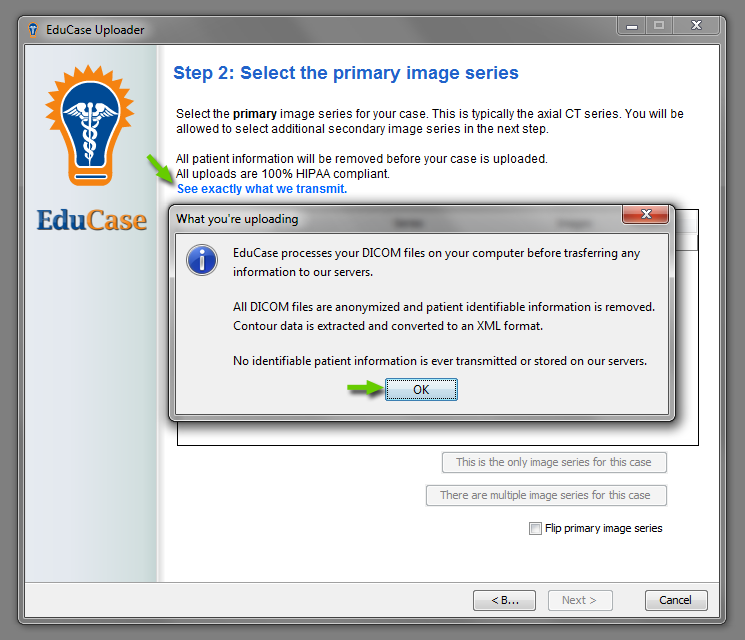
- Click the "See what we transmit" link for detail on what we upload
- Click "OK" to close the popup window
Primary Image Series
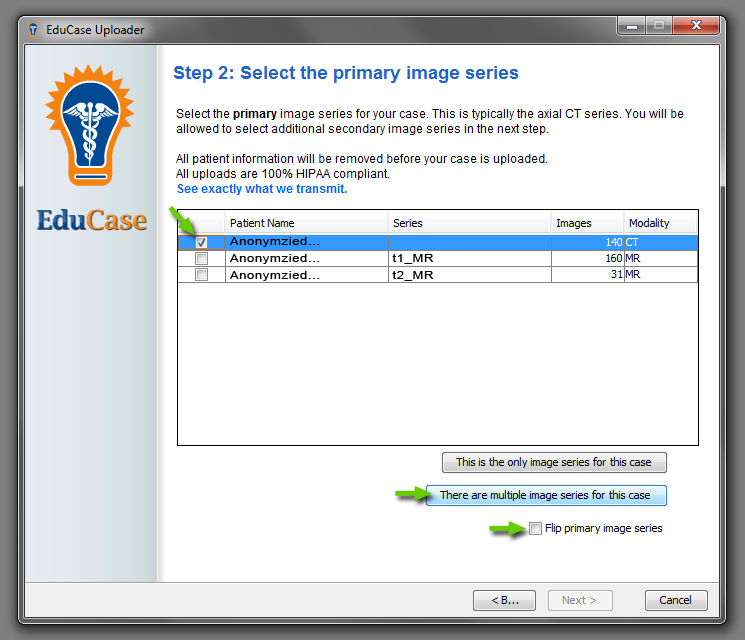
- Find and select your primary data set (In this case it is a CT data set)
- Select the "There are multiple image series for this case" button if you have multiple data sets for a case
- Select the "Flip primary image series" only if you have a prone case and need to see it in supine
Secondary Image Series
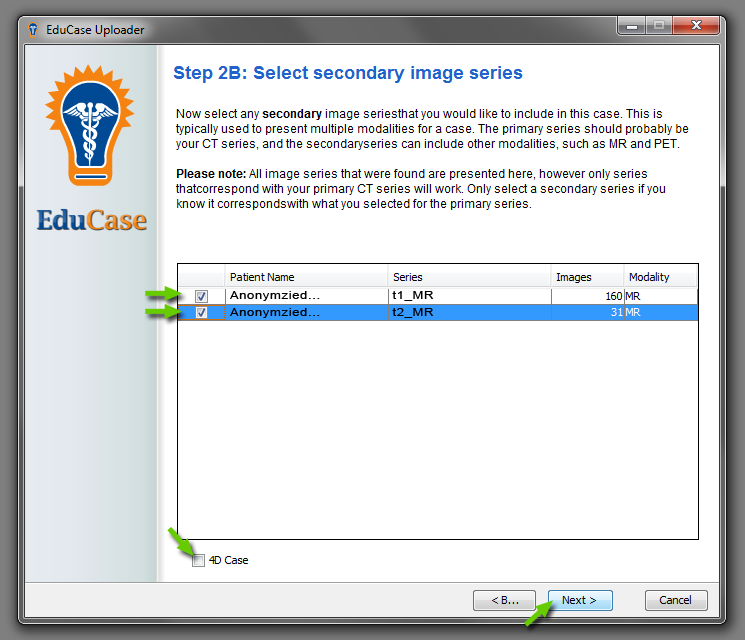
- Select all the secondary image set you wish to upload with your case
- Select the "4D Case" checkbox only if the secondary image sets are gated 4D respiratory image sets
- Click "Next" to continue
Isodose Data
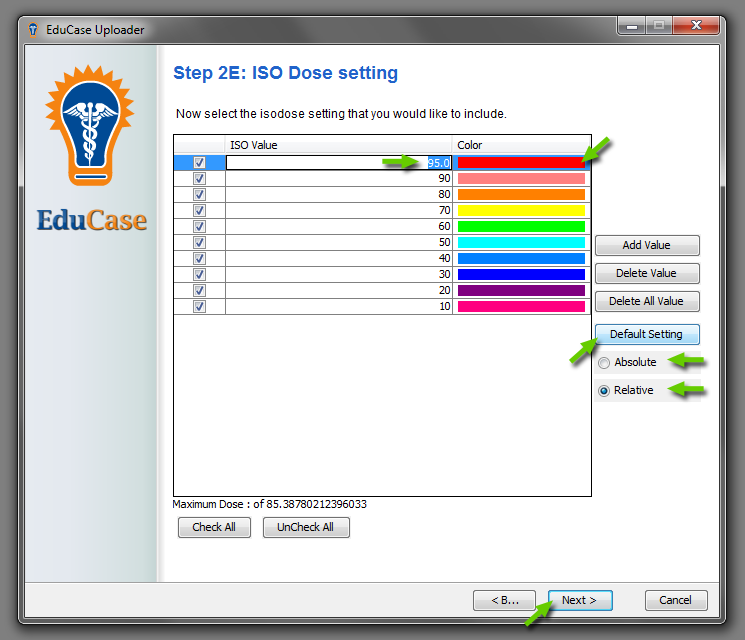
- The Dose value window will appear only if your case data has a dose file
- Click the "Default Setting" button to load a default list of values
- Select the "Relative" or "Absolute" radio button
- Double click and edit dose values if desired
- Click the color box to change the dose value color if desired
- Click "Next" to continue
Case Details
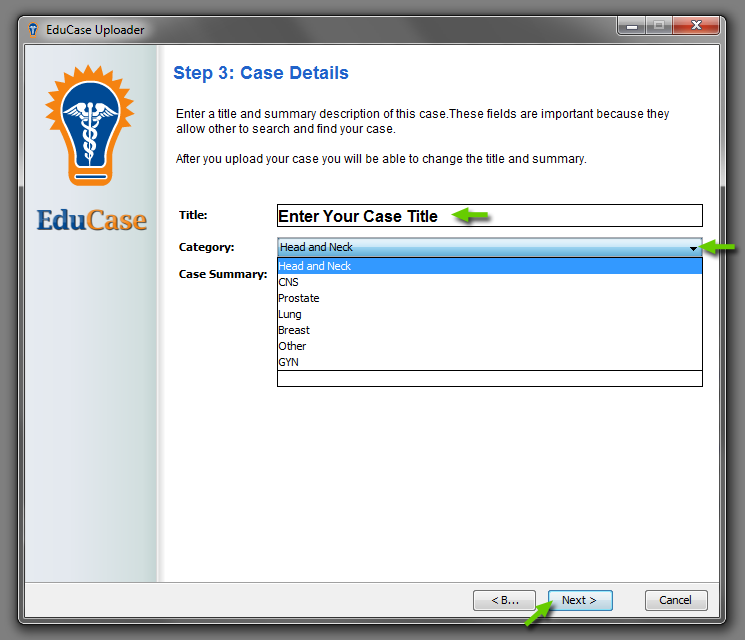
- Type the title of your case in the "Title" text box
- Select the category from the "Category" pull down menu
- Type a description of your case that will be posted in your case listing
- Click "Next" to continue
Uploading DICOM data
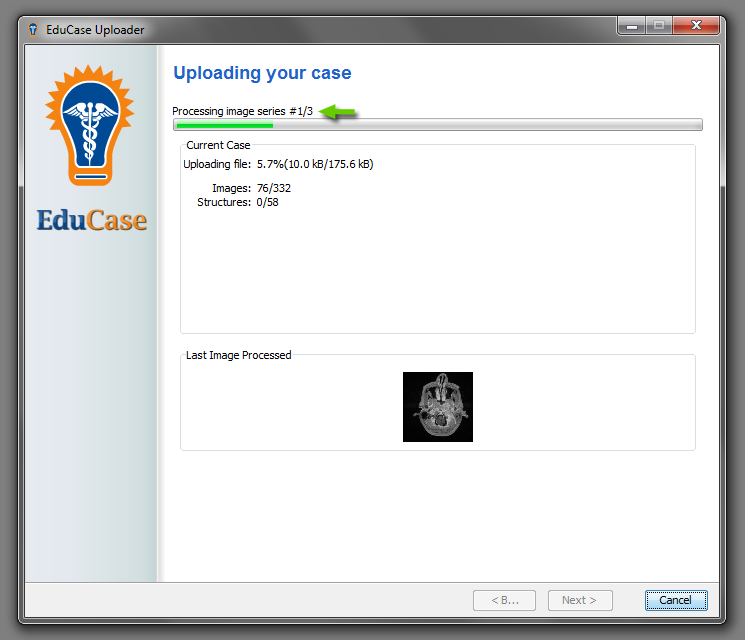
- The Uploader Tool will analyze your case data (no action required)
Processing and Uploading Structures
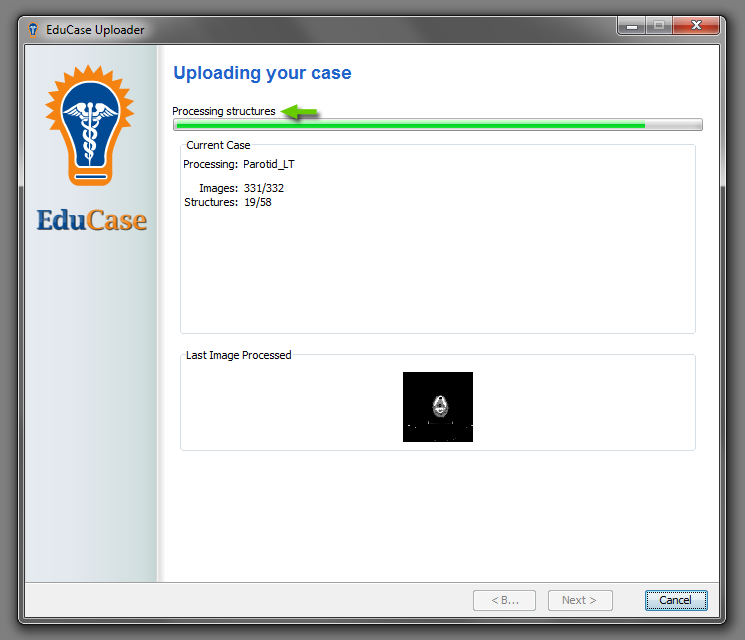
- The Uploader Tool will analyze your case structure data (no action required)
Processing and Uploading Orthogonal Images
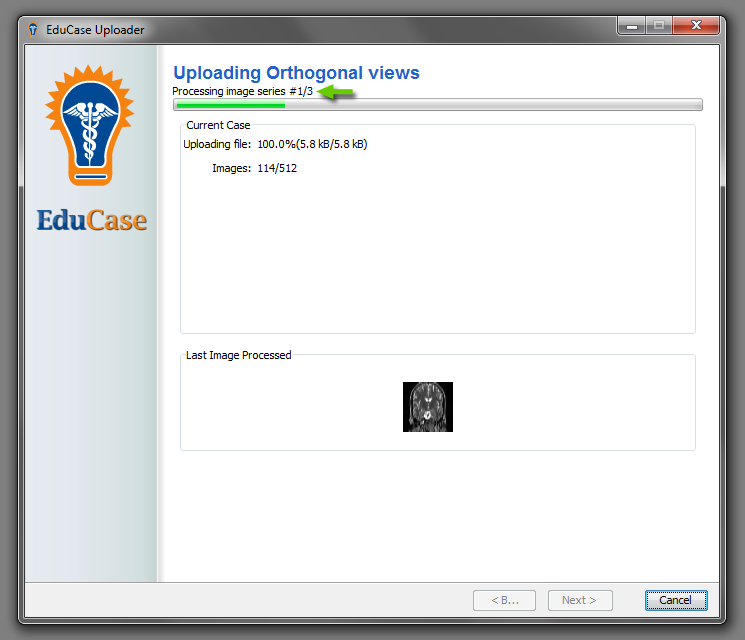
- The Uploader Tool will parse your case data for orthogonal images (no action required)
Upload Completion
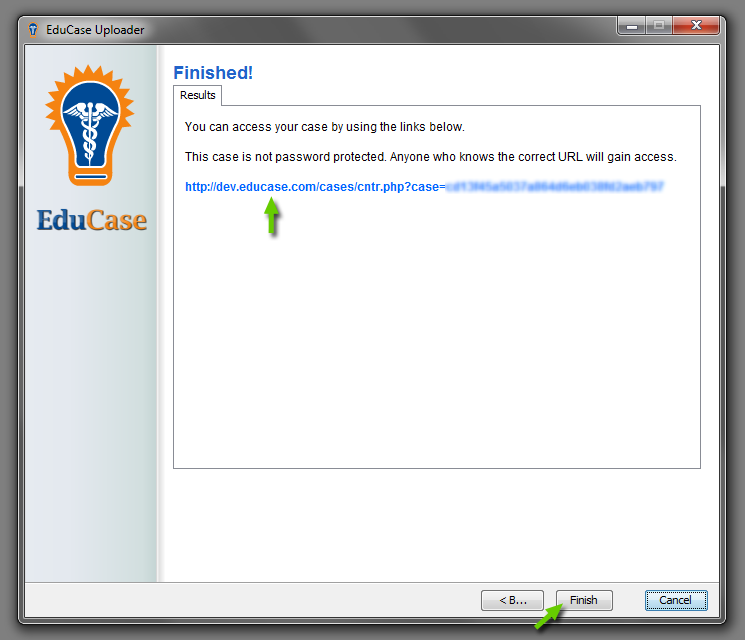
- After the upload process is complete, the Uploader Tool will provide a link to you newly uploaded case to the EduCase server
