Annotation Tools
View Annotations

All users have access to any annotations that have been added by the caseowner. A popup alert will inform user is annotations have not been added to a specific case.
![]()
Click the "Annotation" icon in the Contouring Tools menu bar to initiate the annotations. Annotations are contour specific and will have a colored open icon attached to the contour with the same color. Click the icon to open the "View Annotation" description center.
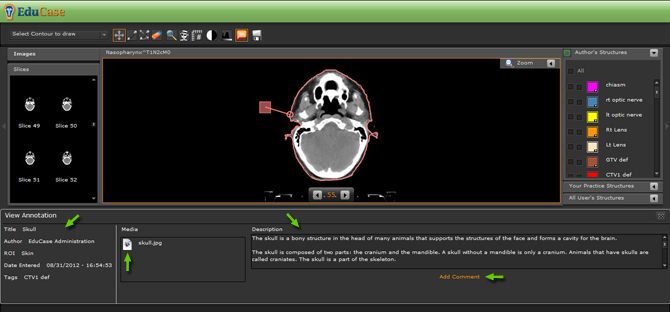
The first column contains:
- Title: Which is the title of the annotation the caseowner gave to this annotation.
- Author: Is the name of the user (caseowner) that created the annotation.
- ROI: Is the name of the contour the annotation is parented to.
- Date: List the creation date and time.
- Tags: Are the meta tag the caseowner added to the annotation.
The Media column can contain following media assets:
- Image files including: .jpg, .png, and .pdf.
- Audio files including: .mp3 only
- Video files including: .flv, .mp4, and .avi.
The Description column contains:
- Text description created by caseowner
Add Comment button:
- Allows user to add their comments on the specific annotation they are viewing.
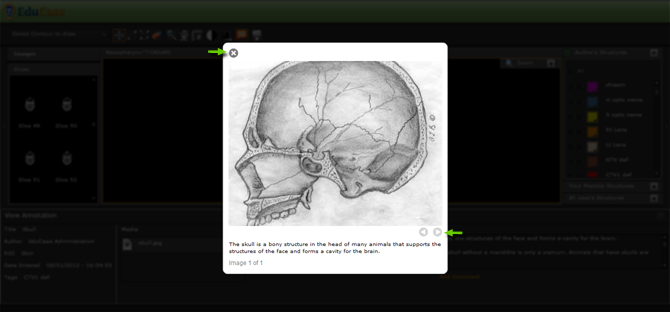
Clicking anyone of the listed Media assets produces a popup window displaying the asset and scroll feature to show all other listed assets. You can close the popup by clicking the "x" in the upper left-hand corner of the popup window.
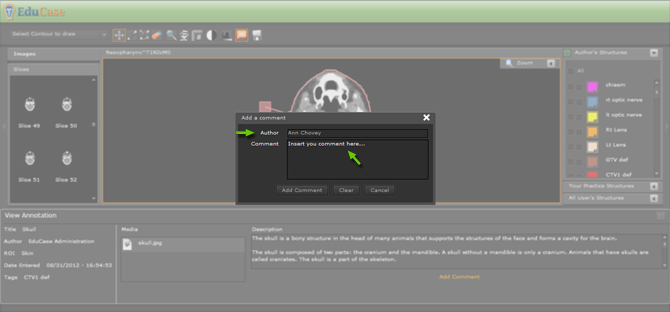
To add a comment click the orange text link "Add Comment". A popup window will open displaying your user name and a text box to enter your comments.
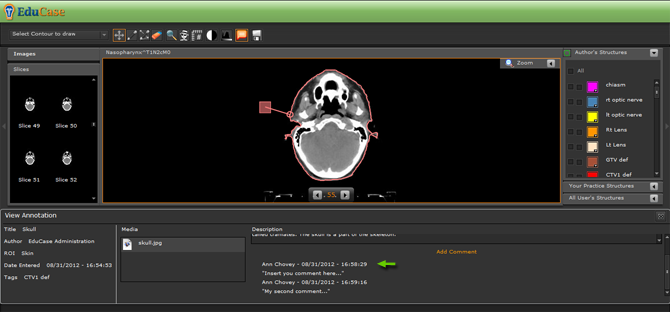
After clicking the "add comment" button your comment will display with all other user's comments in order as they were received.
Before you post: Before posting, please ask yourself the following question: "Am I making a post which is either funny, informative, or interesting on any level?"
If you can answer "yes" to this, then please post. If you cannot, then refrain from posting. If you post anyway, the admins will probably remove your thread.
Before you reply: Before replying, please ask yourself the following question: "Does my reply offer any significant advice or help contribute to the conversation in any fashion?"
If you can answer "yes" to this, then please reply. If you cannot, then refrain from replying.
Creating Annotations (caseowners only)
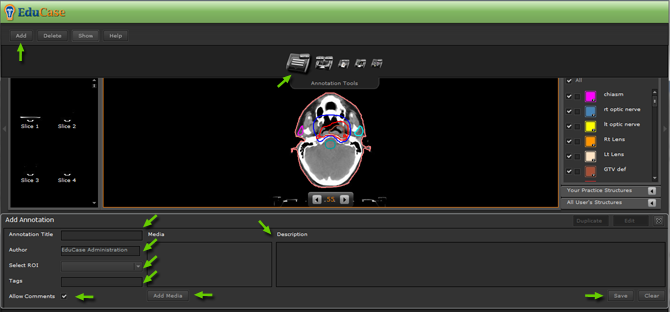
Caseowners have the ability to create media rich annotations to any of the contours associated with a case.
- Start by selecting the "Annotation Tools" folder from the main menu.
- Click the "Add" button in the upper-left menu bar to launch the annotation interface.
- Type a title for your annotation in the "Annotation Title" text box.
- The "Author" box will default to the logged in user name.
- Select an ROI to add your annotation from the "Select ROI" pull down menu.
- Type in the "Tags" text box to add meta data to our annotation. This will allow users and search engine to find your material more easily.
- Select the "Allow Comments" checkbox if you wish to allow users to comment on your annotation.
- Click the "Add Media" button to browse for and upload your annotation media assets.
- Type your annotation's didactic script in the "Description" text box.
- Click the "Save" button to save all you annotation work.
- Click the "Clear" button if you would like to re-write your description material.
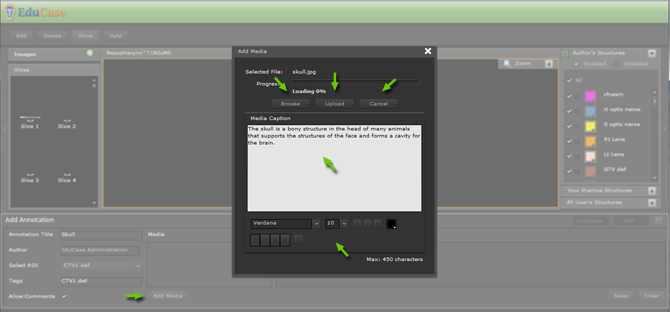
Adding Media assets to your annotation:
- Click the "Add Media" button to initiate the Add Media popup window.
- Click the "Browse" button to select the media asset from you computer.
- Type a caption in the "Media Caption" text box. You can also edit you caption with the text editor options.
- Click the "Upload" button to upload you media asset and media caption.
- Click the "Cancel" button or the popup window "X" in the upper right hand corner if you wish to close the "Add Media" asset popup window without saving.
- You can add any number of Media Assets by repeating the steps above. These can include image, audio, and video assets.
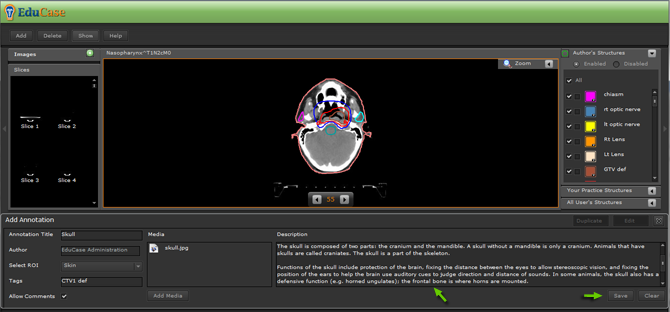
Add your didactic text to you annotation:
- Type your annotation description in the "Description" text box
- Click the "Save" button to compete your annotation once all parameters have been set, all media assets have been added, and description text is complete.
- * Note: at this point your annotation is only available on the selected slice.
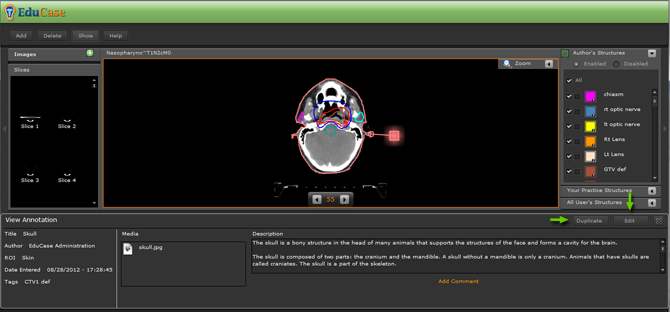
Distributing your annotation to all slices containing the annotated contour:
- Click the "Duplicate" button if you want your annotation to appear on all slices with the given contour.
- Click the "Edit" button if you want to edit any of the annotation parameters in the previous steps.
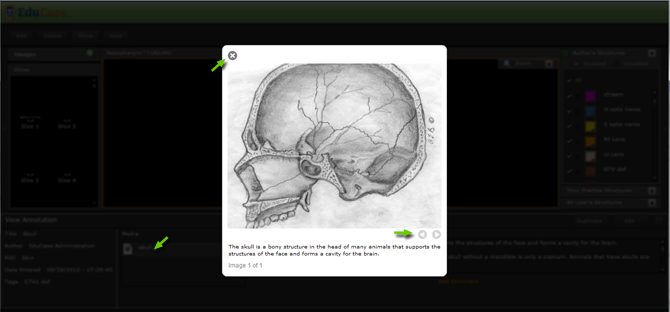
Viewing your annotation Media Assets:
- After saving your annotations, click any of the media assets listed in the "Media" box to launch you media asset.
- If you have more than one asset, click the navigation button in the asset popup to navigate through all assets listed.
- To close the asset popup window, click the "x" in the upper left hand corner of the asset popup window.
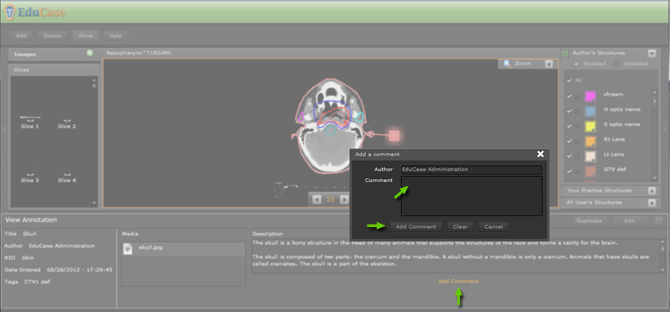
Adding a "Comment" to the comment dialogue:
- Click the "Add Comment" button to launch the comment popup window.
- Type your comment in the "Comment" text box.
- Click the "Add Comment" button to add your comment. It will display along with all the other comments by users in the order it was received. This allows you to answer questions directly from other user that may have posted questions.
